Create Content Understanding Service
To use the Content Understanding Service, you must create the required service within your own Azure resource. This is essential to ensure the security of your data and to keep costs fully transparent and under your control.
The setup takes place outside of Business Central. Since navigating Azure AI Foundry can quickly become complex, this guide walks you through each step clearly and precisely.
Prerequisites
What you need before you start
- A Microsoft Azure account with admin permissions
- An active Azure Subscription already configured in your Azure account
Setup Guide
Step 1: Navigate to Microsoft Foundry Portal
Open the Microsoft AI Foundry Portal .
Disable the New Foundry toggle
Make sure the "New Foundry" toggle is switched off. Not all features required for this setup are available in the new Foundry yet.
Step 2: Create a New Project
- Click "Create New"
- Select the recommended option "Microsoft Foundry resource"
- Click Next
You will now be asked to create a new project.
Choose a meaningful, company-specific name, for example:
Simova-Foundry
A clear name helps you identify this resource later.
If no suitable resource exists yet, you can create one directly within this wizard window. This is the recommended approach.
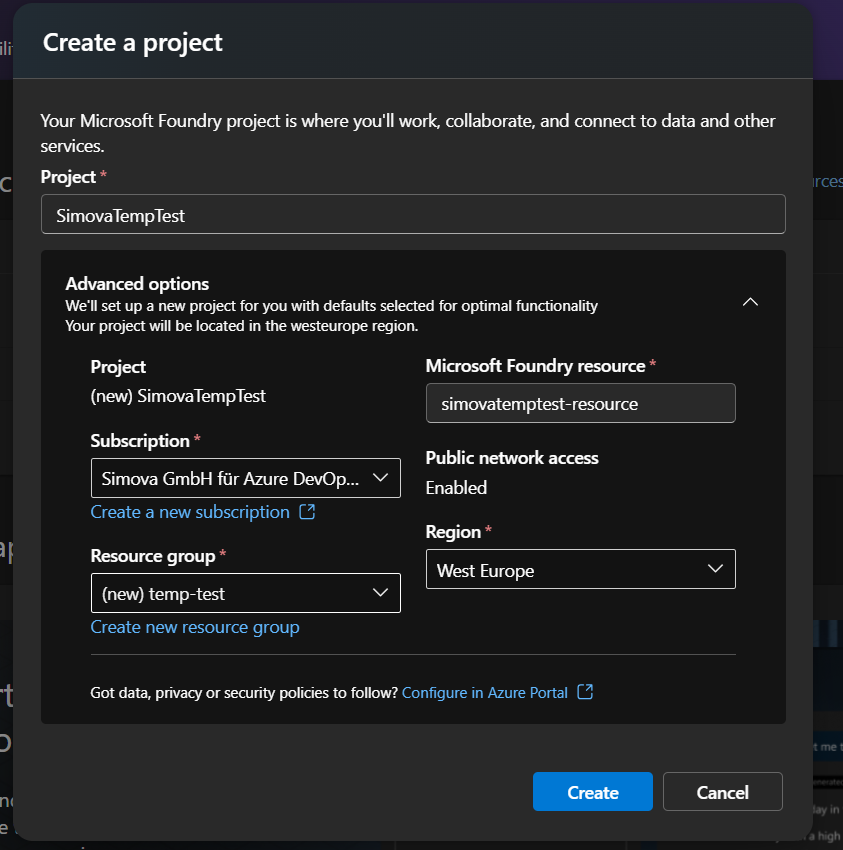
After filling in all required details, click Create and wait for the provisioning to complete.
Step 3: Open Your Project
Once the project has been created, navigate into it by clicking on the project name.
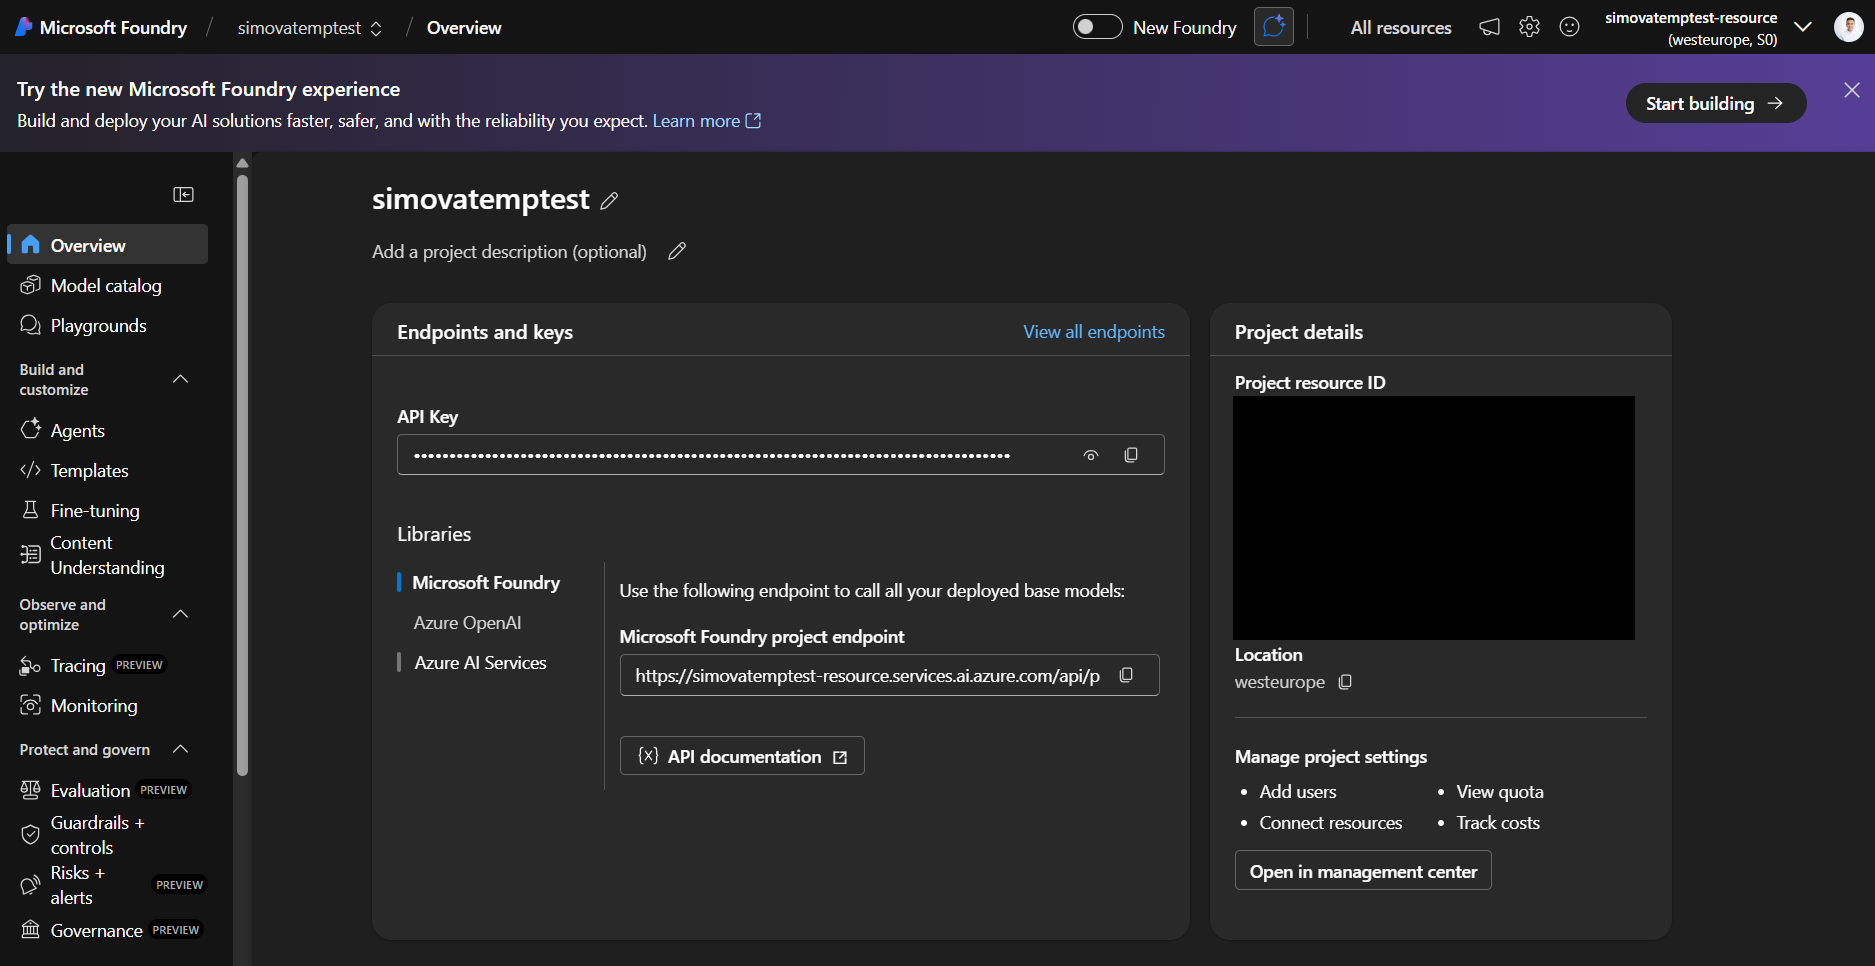
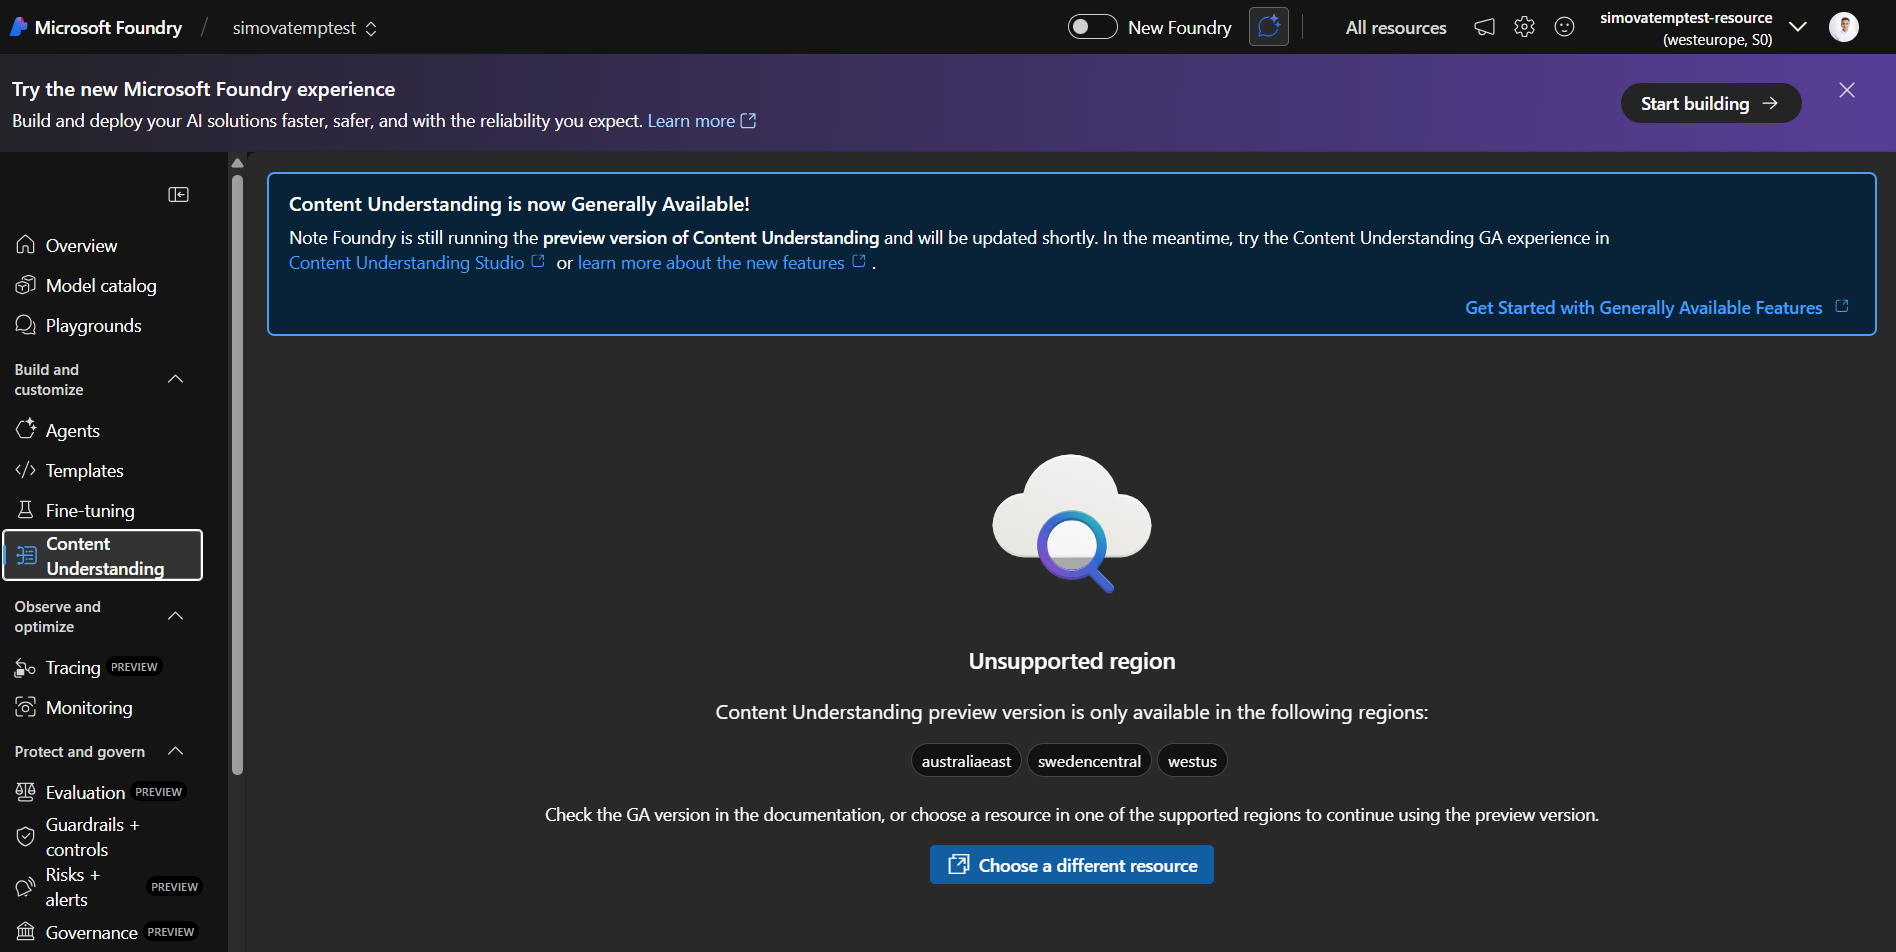
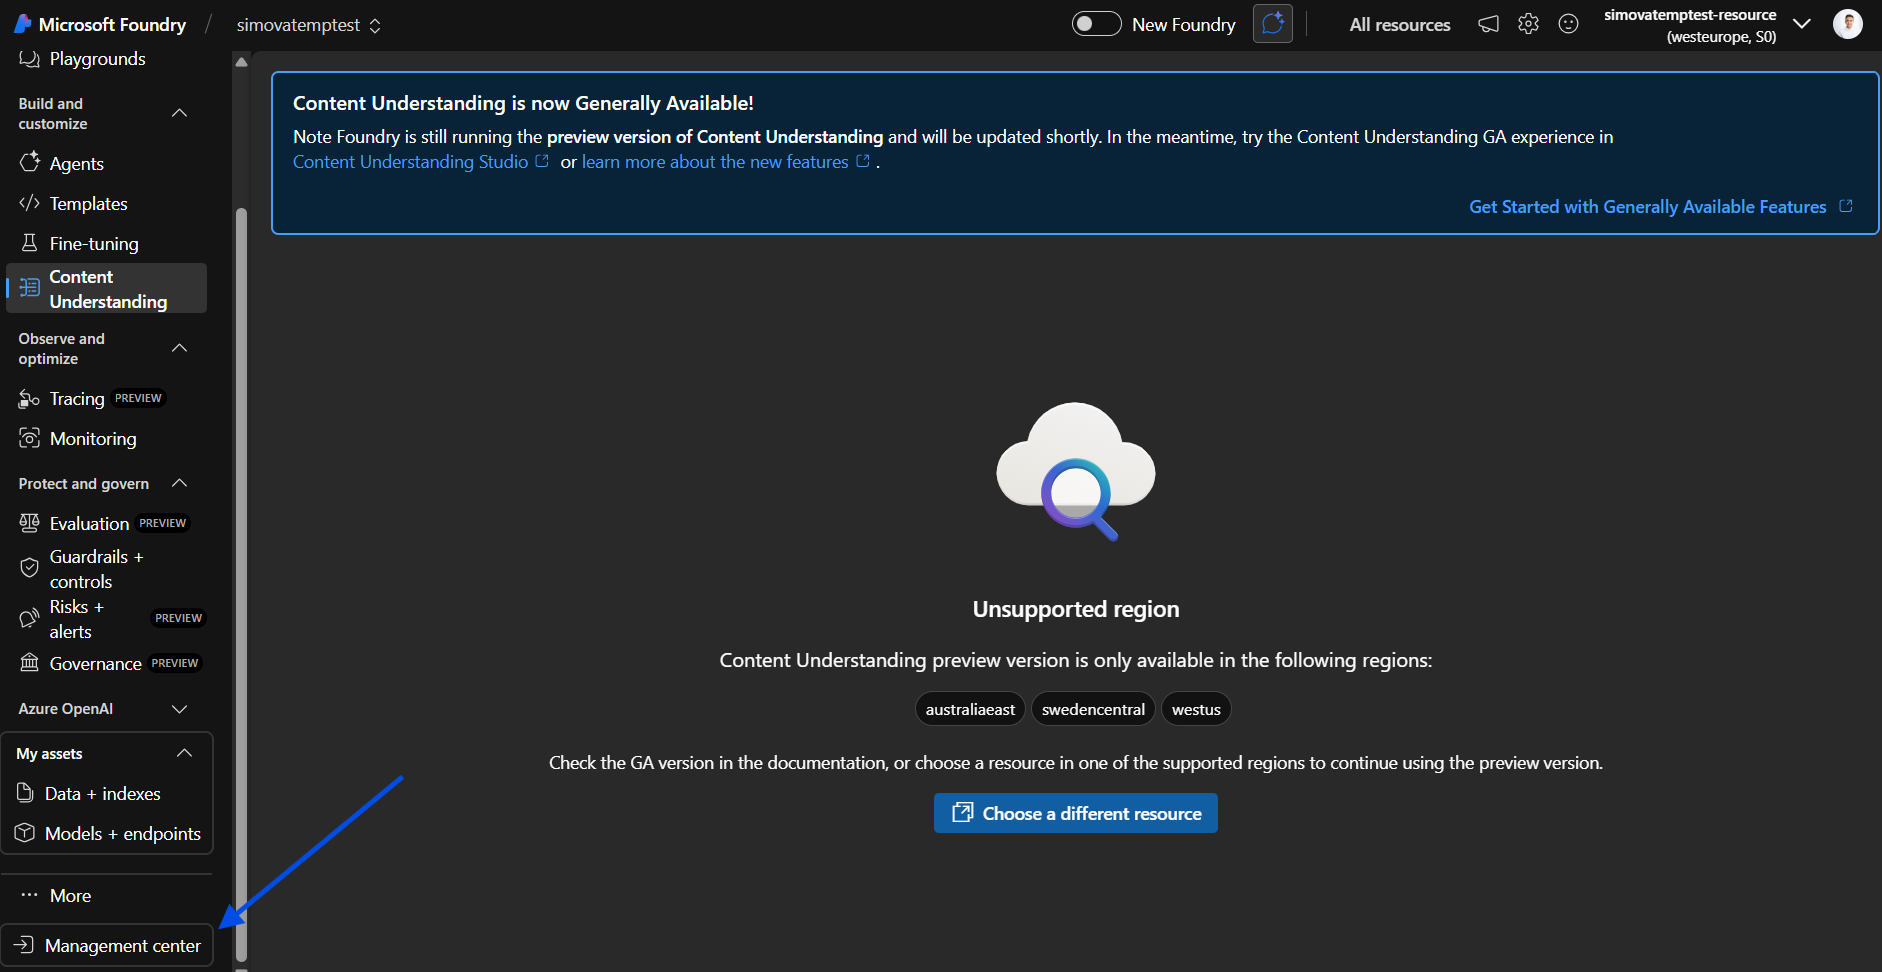
Step 4: Navigate to Content Understanding
In the left-hand navigation, click on the Content Understanding tab.
Step 5: Open Content Understanding Studio
Direct link to Content Understanding Studio
Navigate directly to the settings page: https://contentunderstanding.ai.azure.com/settings
On the settings page, click "Add resource" to begin connecting your resource.

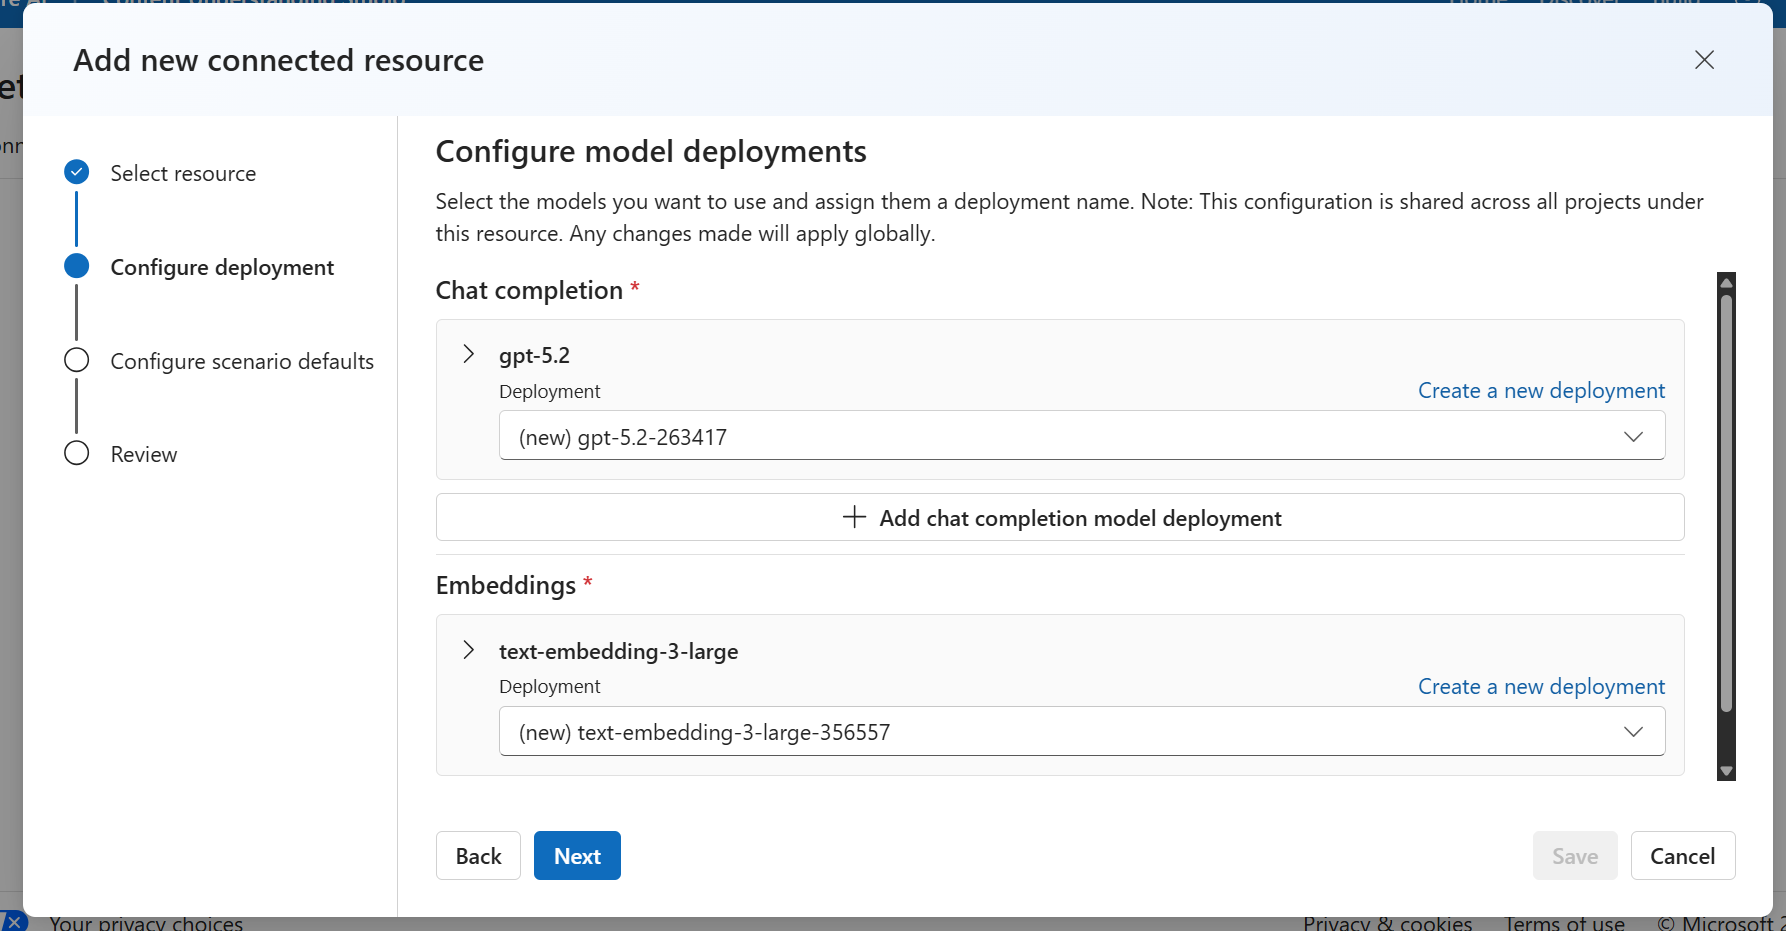
Step 6: Configure the Resource via Wizard
A setup wizard will open to guide you through the creation process.
Recommended configuration
Disable the "Enable auto-deployment" option. This allows you to manually assign your own AI model and always use the latest available version for the best results.
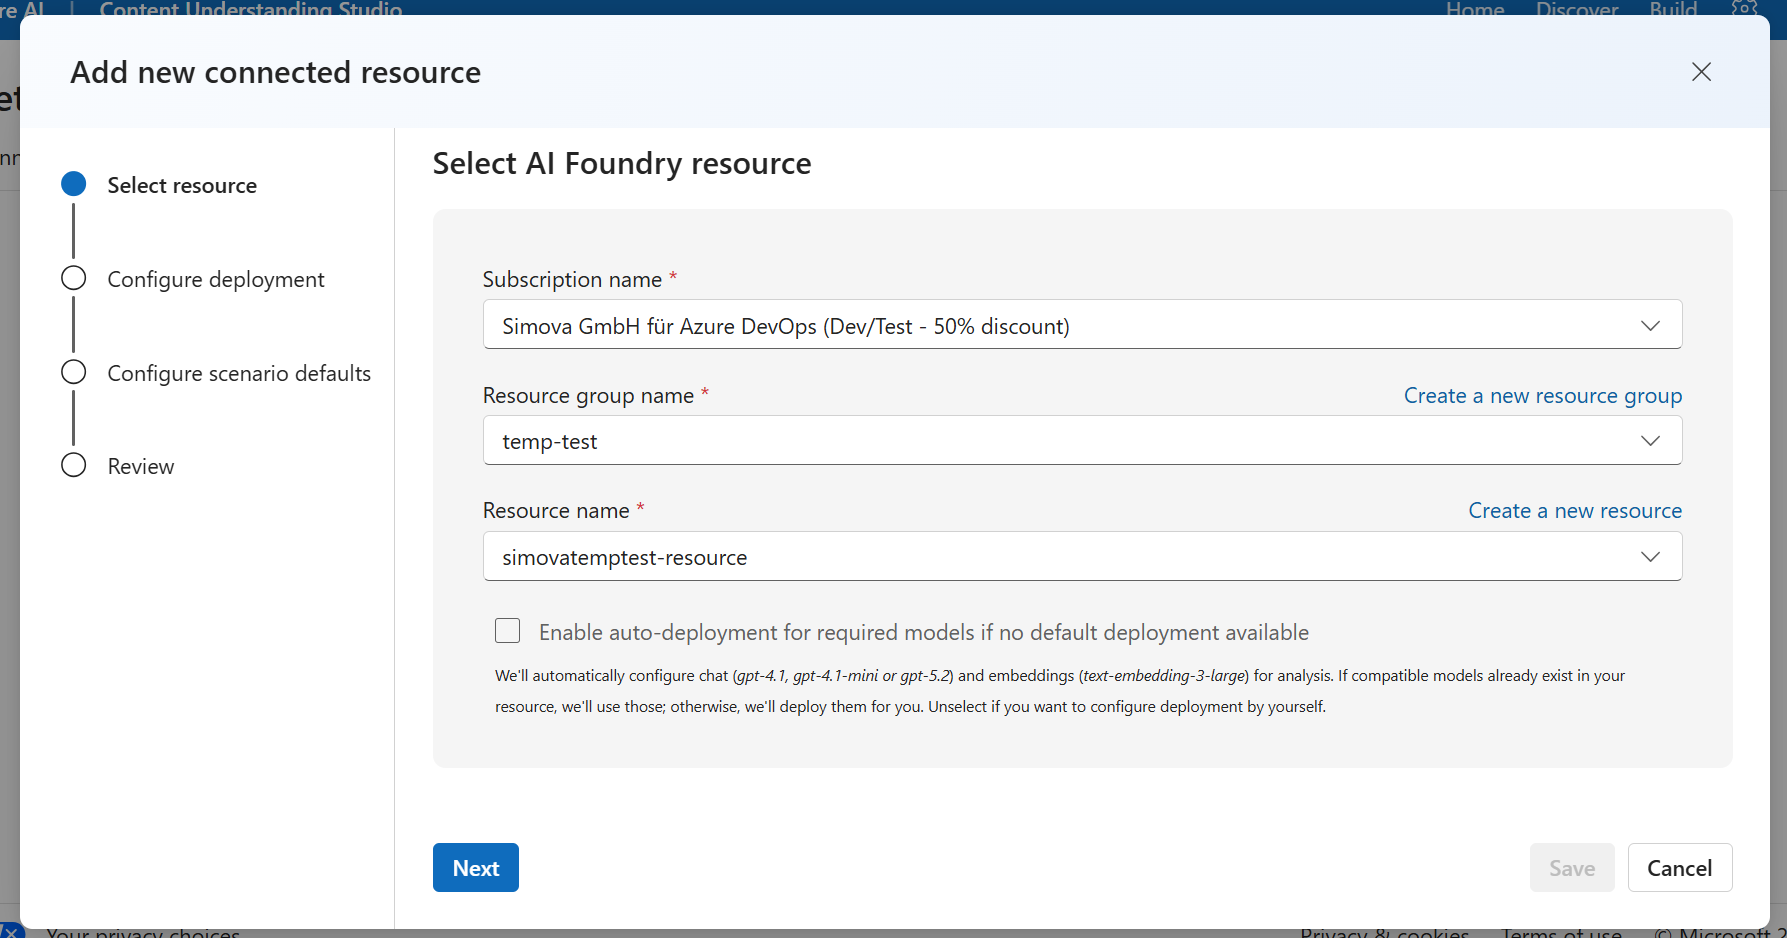
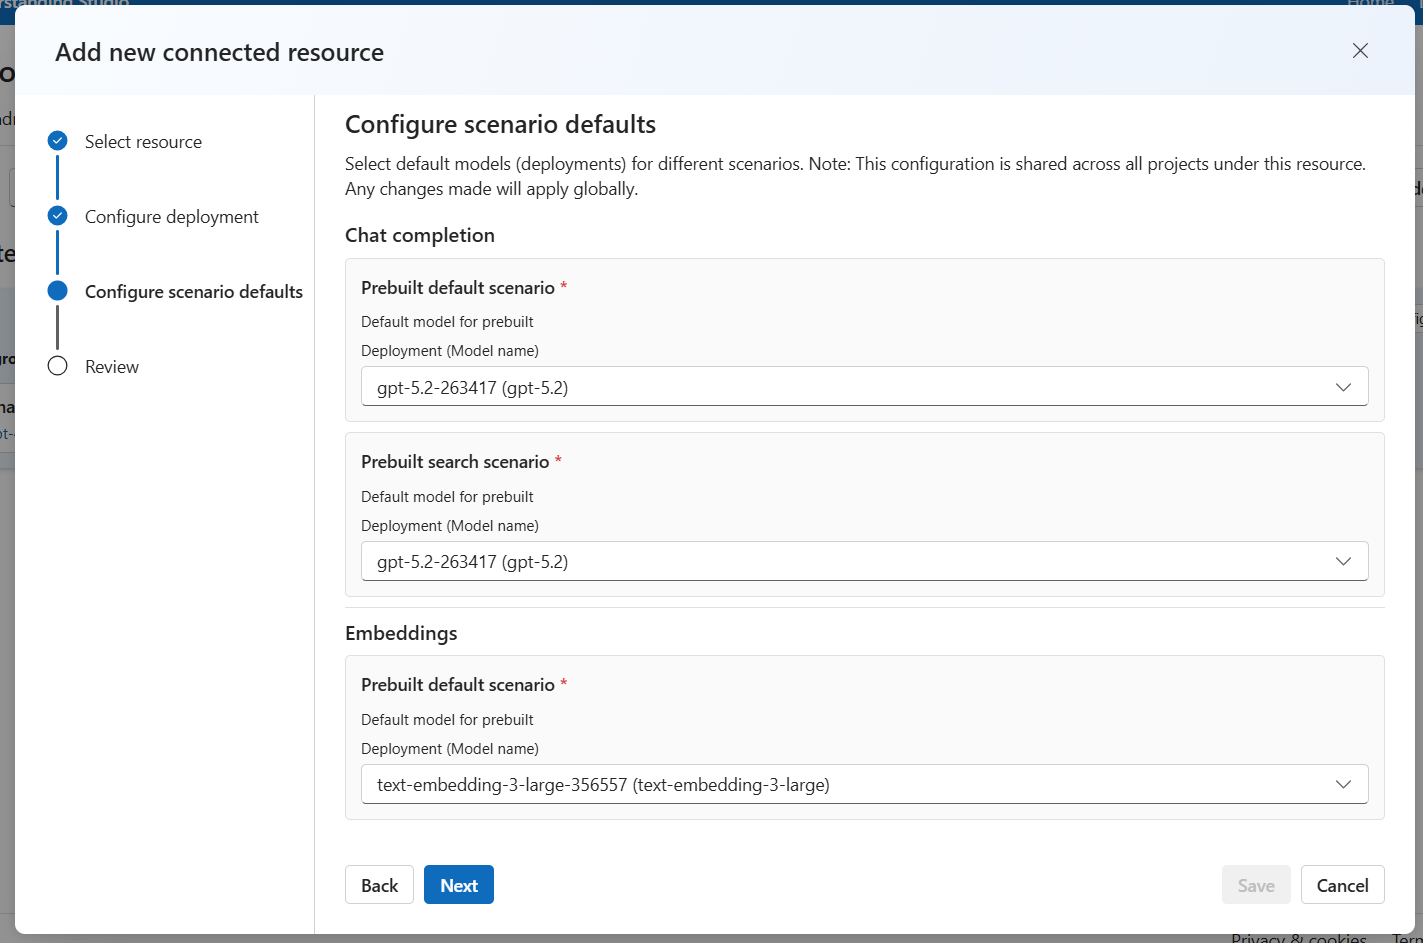
Complete the wizard and wait for the resource creation to finish. Then return to Microsoft Foundry.
Step 7: Open the Management Center
On the left-hand side, in the bottom corner, locate and click "Management center".
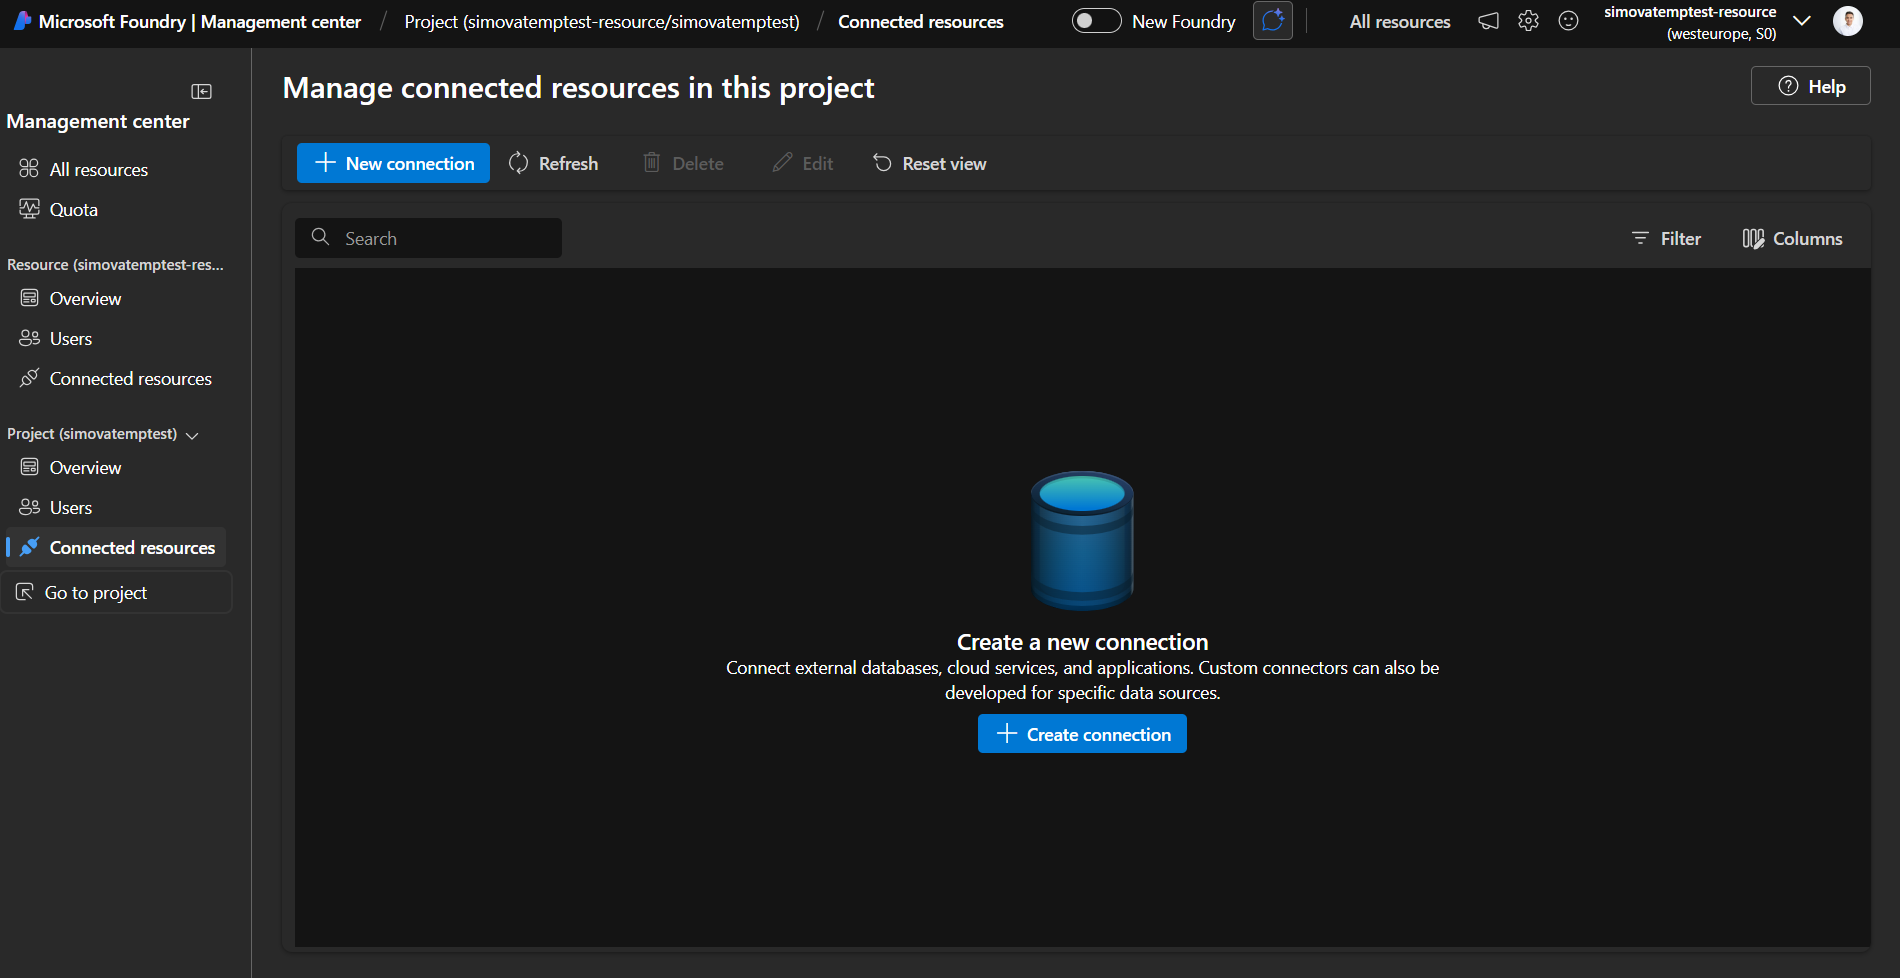
Step 8: Add a New Connection
- Navigate to Connected Resources
- Click "New Connection"
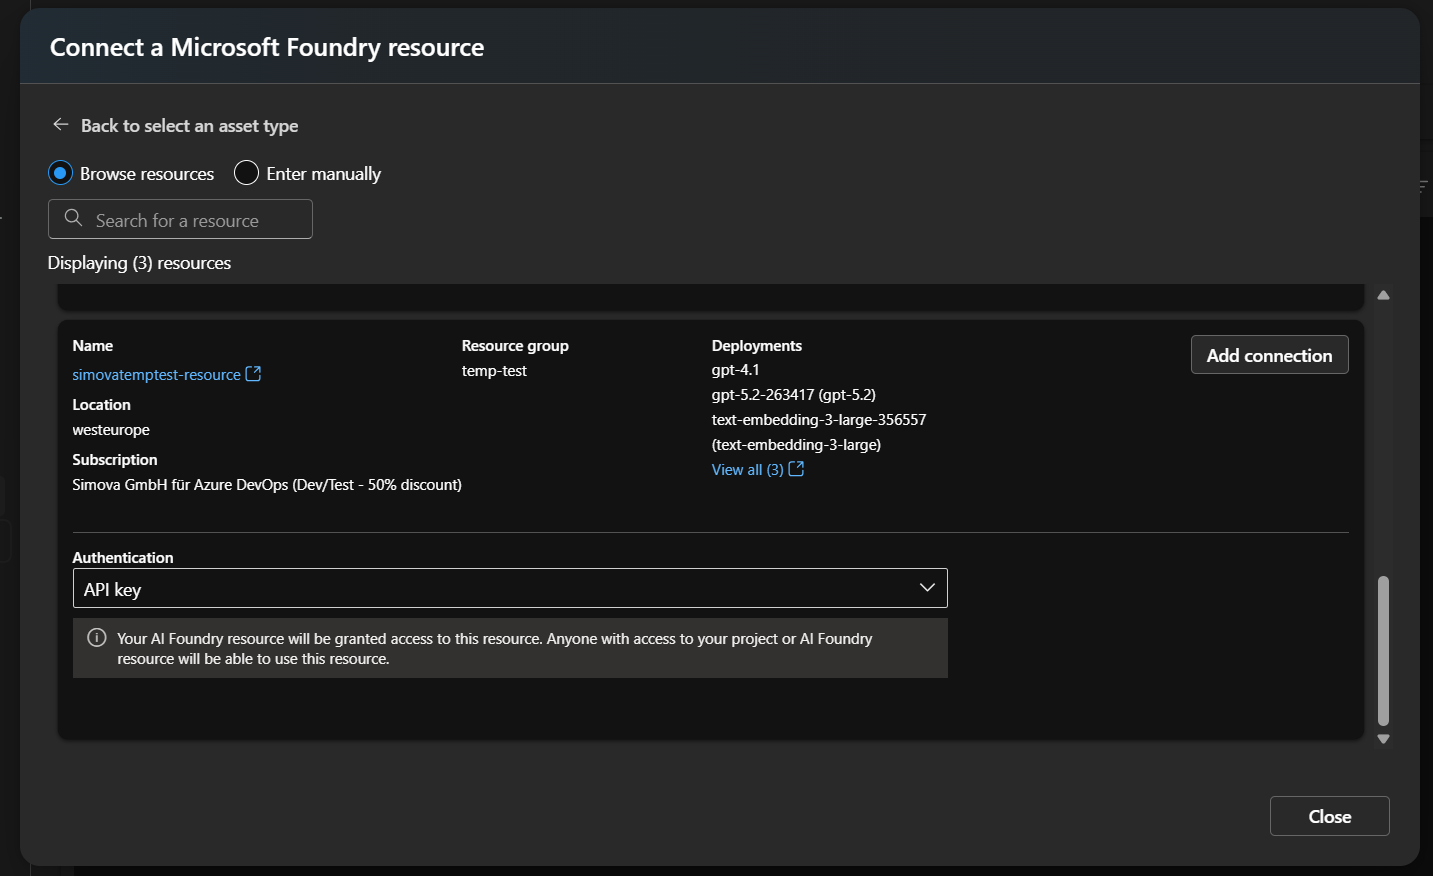
- Select Microsoft Foundry from the list
Step 9: Add Your Resource
Your newly created resource will appear in the list. Click Add to connect it.
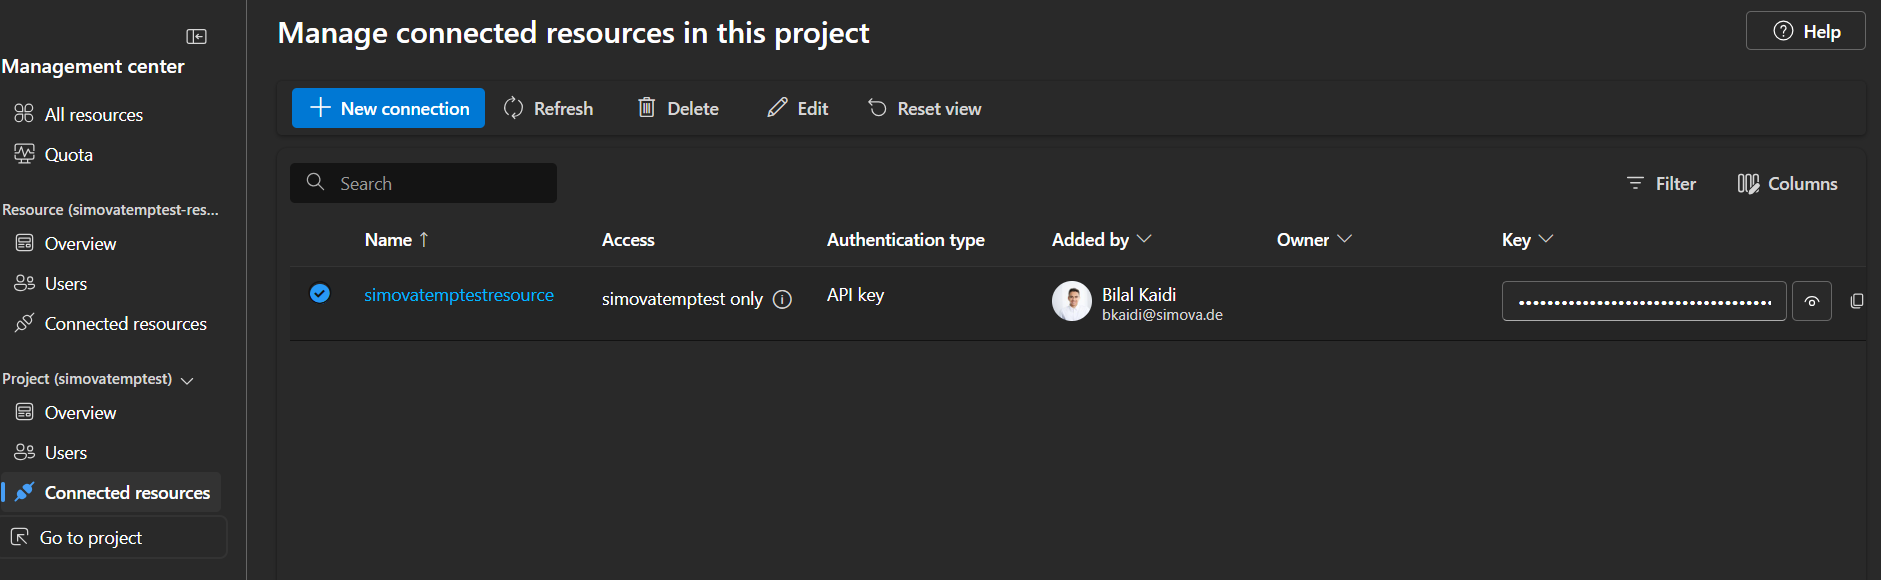
Step 10: Verify the Connection
Your resource should now be listed under Connected Resources. The Content Understanding resource is successfully linked to your Foundry project.
Step 11: Retrieve Your Credentials
To find your credentials, navigate as follows:
- Open the Management center (bottom-left corner of your Foundry project)
- Go to Connected Resources
- Click on your newly added Content Understanding resource to open it
You will find the two values needed for your Business Central AI Service setup:
| Field | Description |
|---|---|
| Target | The service endpoint URL |
| API Key | The authentication key |
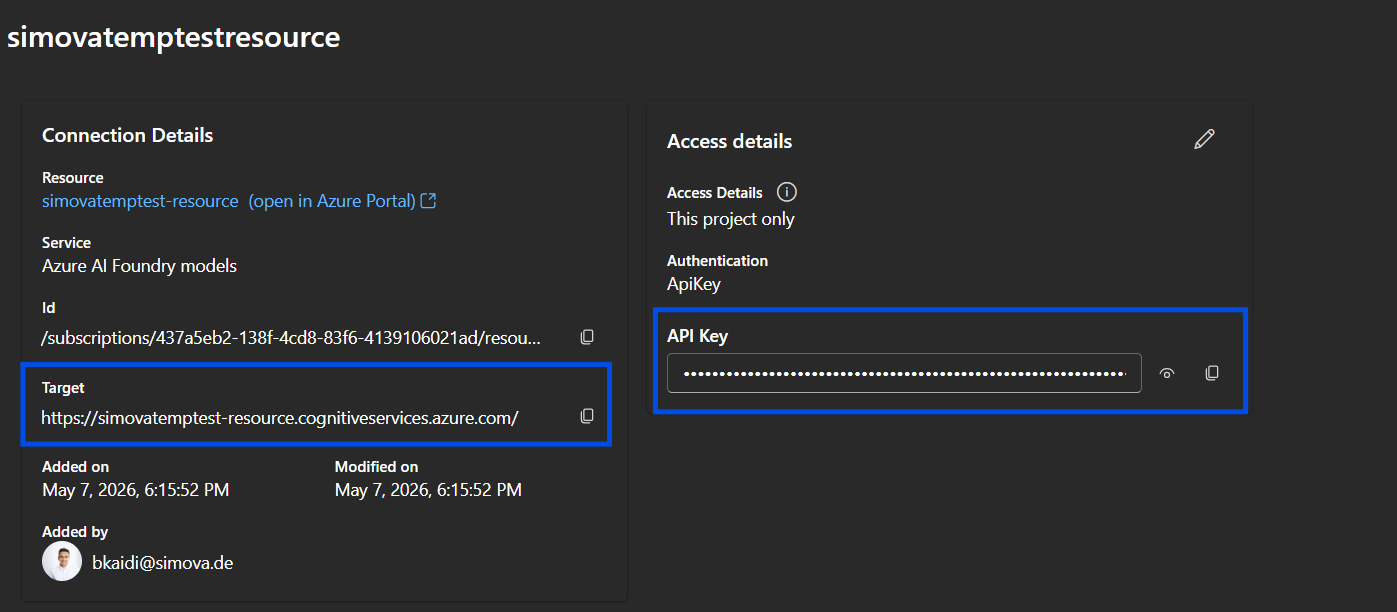
Enter both values into your Business Central AI Service configuration. You're all set!
Important: Validation Limitation
The Business Central AI Service validation cannot determine whether your resource is correctly configured: it can only verify that the resource exists.
Always test your full process end-to-end after setup to confirm everything works as expected.