Release Note Configuration
In Release Notes for DevOps you have the ability to customize your release notes. You can define your own release notes configuration here. You can find this configuration by navigating to the settings in the Changelog Hub.
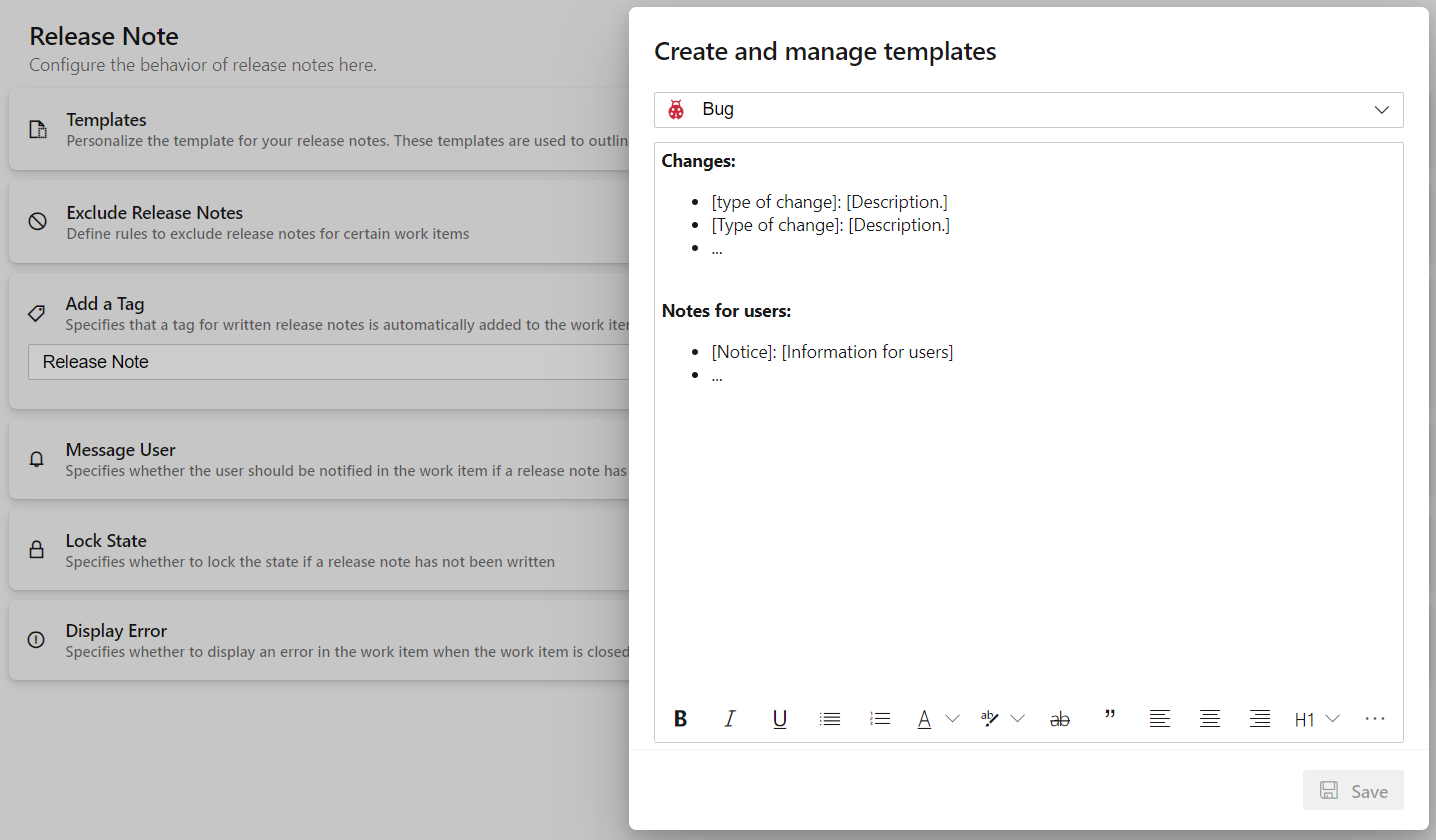
Templates
The template feature allows you to define templates for each work item type. These templates are accessible within the release notes of the respective work items. To create these templates, an HTML editor is provided to facilitate the composition of the templates. By using these templates, you establish a unique structure for the generated release notes. This approach ensures a clear and organized format for your change logs.
An example template for release notes contained in work items of type "Bug" might look like this
Exclude Release Note
This feature allows you to define rules for excluding release notes in work items. You may not need release notes for certain work items, and you may not want your team to write release notes for those specific work items. To accommodate this, you can define rules to exclude release notes.
Create a Condition
Within the "Exclude Release Note" panel, you will find the "Add Condition" action. This creates a new condition row where you can define your condition.
Specify the value you want your condition to evaluate. The following options are available:
Work Item TypeWork Item Tag
Specify the operator for your condition. You have these options:
=signifies that the value must be equal to exclude the release note.<>signifies that the value must not be equal.Containsignifies that the value must be present in the tag.Does Not Containsignifies that the value must not be present in the tag.
In the last column, define your desired value. This sequence creates a completed condition in your system.

With these conditions, release notes in work items with the type "Task" will now be excluded.
Translator
This feature allows you to integrate a translator into the HTML editor. A button will appear that allows you to translate written text from your desired language to another language that you have configured.
Currently, you have the option to integrate the DeepL engine. In the configuration panel you will find several fields where you can enter your data.
To display the translator in the text editor of the release notes, you can use the first action to control whether this feature should be enabled or not.
Configure the Translator
To connect to your DeepL account for translation, you need to enter your API key into the "Api Key" field. This is necessary in order to establish a valid connection with the DeepL API.
DeepL offers multiple packages for API integration, including the DeepL API Free package. If you are using this package, you need to check the "Free API" box. For all other packages, leave this checkbox unchecked.

The Source and Target Language define which language is to be translated into another language. To set up automatic language detection, you can select "Auto Detect" as the value for "Source Language". This way, any input language will be translated into the desired target language.
Add a Tag
By enabling this action, a tag is added to the relevant work item when a release note is written and saved. You can also define the name of the tag in the provided text field. This tag is added to the work item only once and is not duplicated.
Notifications
The following actions are recommended when a release note is required in your work item process.
Message User
This action notifies the creator of the relevant release note when the associated work item is completed without a release note. The notification is not displayed if the release note is excluded.
Lock State
Lock State locks the status of the work item to Completed/Done if there is no release note for the work item.
Display Error
Use this action to specify whether a work item should receive an error message if the work item is completed but no release note exists.