CTI Tray Application (OAuth)
Tray Application Changes
Starting from CTI Tray Application v5.0.6.0 older user configuration will no longer be usable. CTI v5.0.6.0 will have an OAuth integration, and no longer support SOAP Url but OData instead, therefore the server port for On Prem must be using the port which is provided in the OData link not the SOAP link. Business Central On Premise OAuth is available starting from CTI Tray Application v5.0.8.0.
Warning
As SaaS no longer providing Web Service Key the login for SaaS must be used with OAuth.
Setting up the App for OAuth
1. Setting the app in Azure Portal. (Mandatory for first time setup)
This step is required for the first time, to make the OAuth connection between the Tray Aplication and Business Central communicate with each other.
Steps :
Creating new app registrations
- Navigate to portal.azure.com.
- Login with an account.
- Go to App registrations.
- Click New registration.
- Write a Name for it.
- Choose the tenant type you need.
- Click on Register.
- In the overview page you will already see your Client ID and Tenant ID.
Creating Redirect URL
- Navigate to Authentication.
- Create Add a platform.
- Choose Mobile and desktop applications.
- Here you can choose the first option which is
 .
. - Click Configure.
- The URL will be used as the Redirect URL.
Creating API Permissions
- Navigate to API Permissions.
- Click add permissions.
- Choose Dynamics 365 Business Central.
- Choose Delegated permissions.
- Choose user_impersonation.
- Click Add Permissions in the bottom of the Request API permissions page.
Creating scope (only for On-Premise)
- Navigate to Expose an API.
- Click Add a scope.
- The Application ID URI will automatically be filled.
- Click Save and Continue.
- Click Add a scope again.
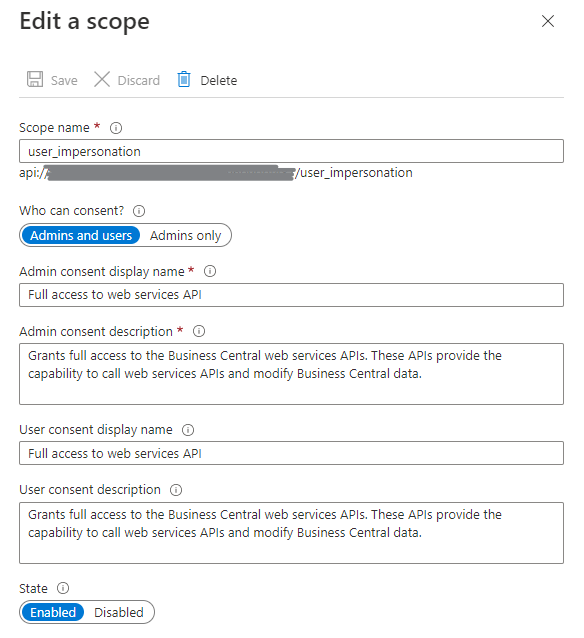
- Enter user_impersonation as scope name (important).
- Choose Admin and users for consent.
- Enter Full access to web services API for Admin and User consent display name.
- Enter Grants full access to the Business Central web services APIs. These APIs provide the capability to call web services APIs and modify Business Central data. for Admin and User consent description.
- Set the State to Enabled.
- See picture below as reference.
- Next go to API permissions.
- Click Add a permissions.
- Choose My API.
- Choose the one with your App Registration Name.
- Click on Delegated permissions.
- There you will see the user_impersonation permission that you made before.
- Tick on it, and click Add permissions.
Configuring CTI Tray (SaaS)
- Navigate to Webservice Tab.
- Change the Service Method to Webservice SaaS.
- Enter the Tenant ID, Client ID, and Redirect URL from the information that we get before.
- To get the Server OData Value, open Business Central and from the search bar, search Webservice.
- Here you will see the OData V4 URL.
- This will be the value of the Server OData, in this case it is api.businesscentral.dynamics.com

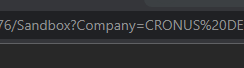
- For the Environment, you can look at the URL in your browser. It will be written before your company, in this case it is Sandbox.
- When all the fields are fullfilled, you can click on the sign in button, and a pop-up window will be open to sign in to your microsoft account.
- After signing in, go to the Webclient tab and paste the settings, and also insert the Server.
- Close the Tray Settings and the Tray will be automatically connected if all of the settings are correct.
Configuring CTI Tray (OnPrem)
- Navigate to Webservice Tab.
- Change the Service Method to Webservice OAuth.
- Enter the Tenant ID, Client ID, and Redirect URL from the information that we get before.
- To get the Server OData Value, open Business Central and from the search bar, search Webservice.
- Here you will see the OData V4 URL.
- This will be the value of the Server OData, in this case it is bc-test.simova.de

- For the Port, you can look at it behind the server OData URL, in this case it is 7048.

- When all the fields are fullfilled, you can click on the sign in button, and a pop-up window will be open to sign in to your microsoft account.
- After signing in, go to the Webclient tab and paste the settings.
- Close the Tray Settings and the Tray will be automatically connected if all of the settings are correct.
Authentication outside of the company domain
If your company is located outside your domain, please add the appropriate domain to your username specification. Please use the following format: domain\username (e.g. AD\test). The domain specified should be that of your company.
Changing Account
- To change account, navigate to the Webservice tab.
- Click on the sign out button.
- If changes are required, repeat steps in Configuring CTI Tray (SaaS) or (OnPrem).
- The sign in button should be shown again and you can sign in to another account.