Build Task
Use our Change Logs for DevOps build task to automatically insert change logs into your DevOps pipelines. With this build task you have the possibility to automatically create change logs via the pipeline. The release notes are extracted from the reference sources of a build's work items. It then creates a changelog with your default settings. This changelog is exported as a Markdown file to any Git repository.
How to use the Release Notes for DevOps Pipeline integration
To integrate the build task into your existing or new pipeline, follow these steps
- Open the desired pipeline in edit mode.
- Select the Release Notes for DevOps build task.

Configuration Options
| Parameter | Type | Description |
|---|---|---|
| createChangelog | boolean | true if a changelog entry should be created in the hub; otherwise, false. |
| title | string | The title to display in the changelog. |
| version | string | Only needs to be specified if you want a version to be displayed for the changelog. |
| description | string | Only needs to be specified if you want a description to be displayed for the changelog. |
| placeholders | string | Only needs to fill the specified placeholder values. To overwrite or fill your placeholders add the following syntax in the textfield: [your_placeholder_name=value]. Multiple placeholders can be specified on separate lines or separated by a comma. |
| repository | string | The repository to which the changelog should be exported. You can specify the ID or the name of the repository. |
| branch | string | The branch name that will be used to check the changelog into the repository. |
| pushMode | option | The push mode determines how data is exported to the repository, offering three choices: 'Add' creates a new changelog, 'Modify' appends the new changelog to an existing file (versioning), and 'Replace' substitutes an existing file with the changelog. Please note that this option operates based on the 'repoPath' parameter, which specifies the file path. |
| skipCI | boolean | Determines whether the commit should be marked with [skip ci]. This is useful if you want to avoid re-triggering the pipeline, especially if the trigger is the branch where the changelog is committed. |
| repoPath | string | The path to the changelog document in the repository. NOTE: The path structure works with "/". For example, if you want to store the document in the Changelog folder, then enter Changelog/filename.md. |
Finalization of configuration
Once you have adjusted your configuration, you can add the build task to your pipeline using the Add button. The build task should be listed within the steps section. Here is an example of how to include it:
steps:
- task: Changelogs-for-DevOps-Build-Task@2
  inputs:
    createChangelog: true
    title: '$(Build.Repository.Name) Changelog'
    placeholders: |
      [productVersion=$(App_Version)]
      [buildDate=$(DateTime)]
    repository: '$(Build.Repository.Name)'
    branch: '$(Build.SourceBranchName)'
    pushMode: 'Add'
    repoPath: 'Changelog/$(Build.Repository.Name) - $(Build.BuildNumber).md'
    placeholder_test: 'Test -> $(Build.Repository.Name)'
The placeholders
Output target
The changelogs generated by the build task are stored as markdown files in repositories. You can specify the target repository in the configuration options using the repository parameter. This allows you to import changelogs from the pipeline into different repositories. For example, you can create a changelog in a release pipeline and then export it to a repository that hosts your changelogs on an external Web site.
Permissions
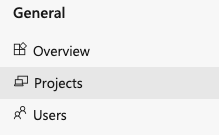
- Go to the project settings page for your organization at Organization Settings > General > Projects.
- Select the project you want to edit.

-
Within Project Settings, select Repositories. Select the repository you want to run the build task on.
-
Select Security to edit your repository security.

-
Search for Project Collection Build Service. Choose the identity {{your project name}} Build Service ({your organization}) (not the group Project Collection Build Service Accounts ({your organization})). By default, this identity can read from the repo but can't push any changes back to it. Grant permissions needed for the build task. Typically you'll want to grant:
-
Create branch: Allow
- Contribute: Allow
- Read: Allow
- Create tag: Allow
